Woodworking Links
Pearce WoodworkingWood Magazine
American Woodworker
Woodworking Magazine

I became an ambassador for Coffee Cup Software before my page was even on the web. I help promote Coffee Cup Software and attempt to help people to make their web pages better. My page is still growing, and I am still learning myself....
First a little history...
My woodworking skills started at a very early age working with my father's tools when I was probably seven. My dad had an old Craftsman 6 1/2" table saw. It was underpowered by today's standards, but it was very accurate. We even had a 6" dado cutter. I built many small projects with that equipment, and learned a lot. We had various other  power tools, and over the years I acquired my own.
Even before getting my own shop, I built quite a number of illusions for use with my other hobby - magic. Many of my illusions were built from scrap lumber acquired from the home builders across the street
And so, I built my wood shop....
My shop includes the following: 10" Craftsman table saw with add-on fence, Delta 12" chop saw, Craftsman head-tilt band saw, ShopFox band saw, Jet jointer, Delta planer, Craftsman drill press, Porter cable router and various other hand tools. For sharpening, I have a Tormek sharpener system. I recently bought a low-cost (cheap) metal cutting band saw (it's a foreign import that does a descent job). My shop includes dust collection for the tools and a Powermatic collection system.
I have a compressor for the air tools that is stored in my garage with connections in the wood shop. The compressor is on a two way switch so I can turn it on from either the wood shop or the garage. I added my air tools when I built my deck and shed - that has been my attitude for buying tools for a long time - find a tool you need for the project you are working on...then go get it!
My woodworking today...
Since I've had my own tools, I have built everything from wall cabinets to a doll cabinet for my daughter (now used to store cd's). Early on, I had built some "Tater & Onion" bins as gifts (seven of them!) and even an early computer table. In 1992, I began my involvement with a local theater group. That involvement turned my shop into a prop building facility for a play each year. Over the past six years of so, I have been assisting a local boy scout troop, various projects included patrol boxes, wash station, and a really cool Klondike sled. I have more ideas and hope to build more things soon.
Electrolytic Rust Removal
Have you ever seen this? It is very cool and works fantastic. If you have rusty tools to clean, this may be the system for you - Here's the link: Electrolytic Rust Removal
I'm also working on putting together a kit to make it even easier to make - check out my Buy Stuff page for more information.
Woodworking Projects
Assembly Table
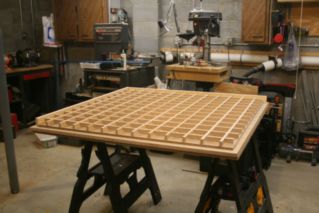
10/8/2010 Update - I have just completed building an assembly table from the March 2010 issue of Wood magazine. I have needed a table like this for a long time, and this will replace  building projects on top of my table saw (I needed a large flat area for building various projects).
The table top is made from 1/2 inch MDF as a torsion box (glued up grid) on the inside. It is edged with clear pine. The table is very heavy, but also dead flat. It is about 47" square and 31" tall. The legs and undercarriage of the table are made from redimensioned dimensional lumber (2x8) stock. By using the wider stock and cutting it down, you end up with boards that are flat and square. The original design called for drawers and dividers for storage, but I have not decided to do that as of yet.
The finished table has locking wheels to allow it to move when needed. These wheels are great, because not only do they lock the wheel from turning, they also lock the pivot on the wheel as well (these wheels came from Woodwerks).
I finished the top with 3 coats of brush on satin polyurerthane from Minwax.
Chop Saw Stand
11/3/2010 I am now working on a chop saw stand. I have a 12" Delta that sits on a $15 folding bench stand (Workmate knock-off). The stand was difficult and dangerous to use due to the lack of side support. Also, with lack of any kind of stop, it was not possible to cut duplicate parts with any kind of accuracy.
I decided to go with a similar design to my assembly table
The basic design I chose combines various elements from different tables I have seen. The side wings are a torsion box made from 1/4" MDF. This made the wings very strong and dead-flat.
I used a T-track fence guide manufactured by Kreg (the pocket hole people)
I also replaced the existing aluminum fence on the saw with a wooden one.
Router Table
I have a decent router table top (Rockler) - but decided I needed a better stand. My original table was modeled after Rockler's stand (using 1" lumber). This worked, but was not very mobile (Doesn't look like Rockler even sells there version anymore). The stand I built once again uses the basic design of my assembly table. This was easy to build and very strong.
Cabinet Leg
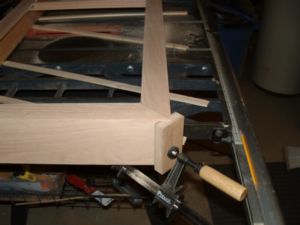
A friend of mine needed a replacement leg for  a cabinet. He brought me a mock-up which was a cardboard duplicate of the existing leg. I first made a glue-up out of Poplar to match the size needed. I then generated a cad file using TurboCad and printed out the cad file at a 1:1 ratio. This was then glued to the surface of the previously made blank (with spray mount), and cut out with a band saw.
Check out how they went together here: Table Leg Project

